Project Management Interface
Layout
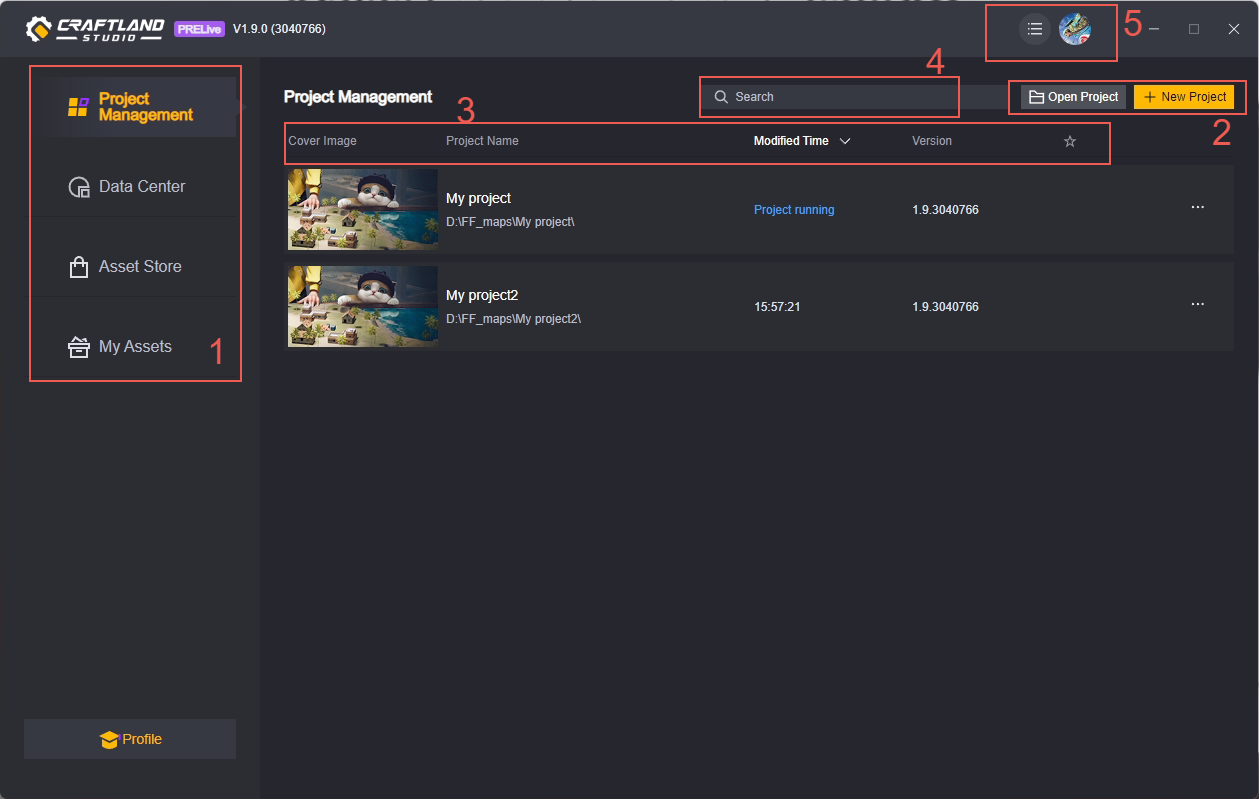
Layout introduction
1. Projects and other interfaces
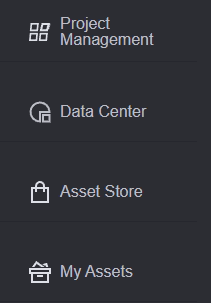
In the Project Manager window, there are four tabs:
1. Project Management, which manages local projects.
2. Data Center, where the data for the currently published maps of the current account is stored.
3. Asset Store, where various resources required for game development are provided.
4. My Assets, where the assets purchased by the current account are managed.
This article mainly introduces the content in 1. Project Management.
2. Create/Open Project
Create Project

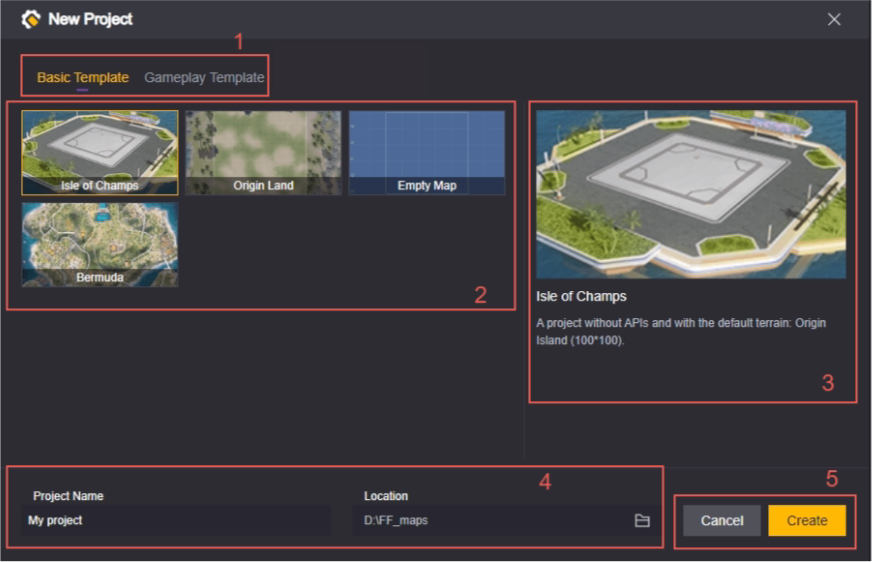
Tap the New Project button to open it.
-
Template Type: We have prepared several template categories for you, including:
Basic Templates, which are templates without code. We provide some initial maps, which will differ in size and preset scenes, and can be selected according to your needs.
Gameplay templates are templates with code for gameplay. They provide some popular game extensions for you to use directly or customize and modify based on them.
-
Template selection: After selecting the general category of the template, you can select the specific template. The template introduction can be viewed in 3.
-
Template introduction: A brief introduction to the template.
-
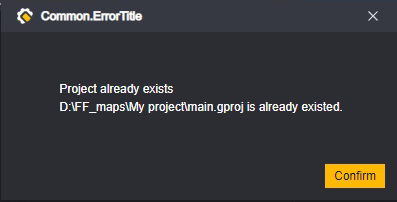
Project Name and Location: You can name and modify the path freely, but make sure that there is no project with the same name in the same path, otherwise you will get the following tips:
5.Cancel and Create: Cancel will close this window and any edits you have made will not be saved. Create will create a new project with the current settings and open it automatically.
Open Project

Open Project will open an existing project on your local PC and add it to your project management list.
Tap Button Open Project will open the system file selection window, where you need to select the project folder, which is named after the project name, and the next level is the folders and files in your project.
For example, this My project folder below is a project folder:
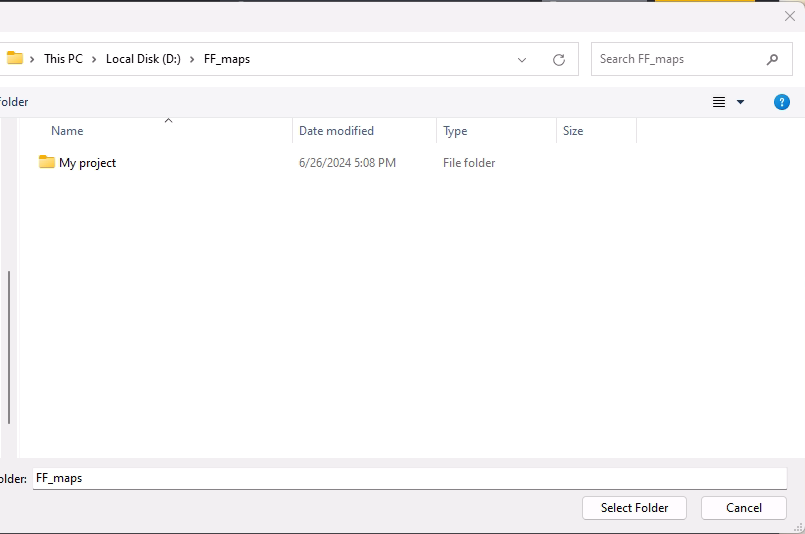
Its files should be:
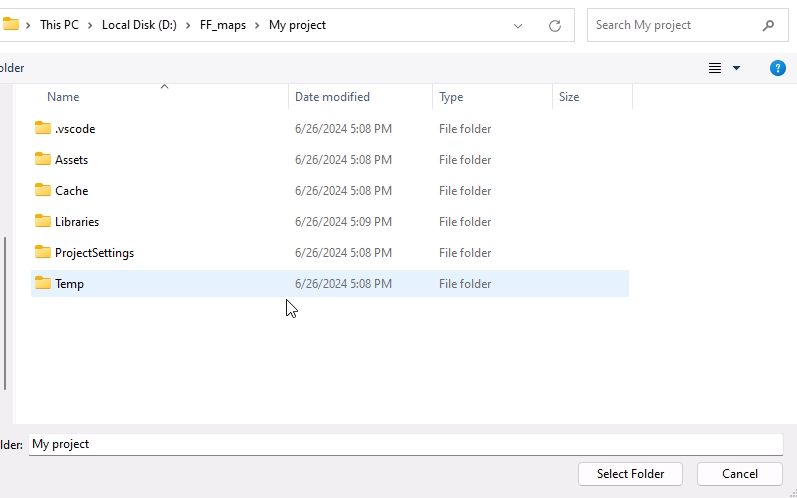
This is a blank project that has just been created.
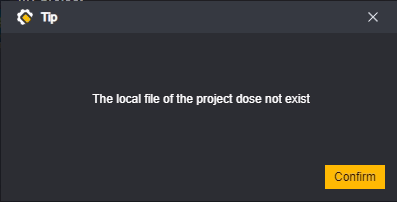
Select My project to open the project. If the wrong folder is opened or the project is incomplete, Tips:
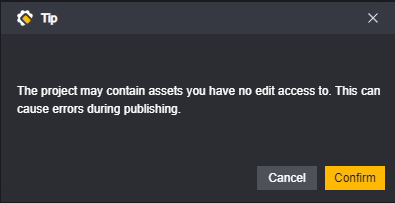
In some cases, you may also get some tips like below. The tips will not prevent you from opening the project, but you may encounter some problems with the modifications to the project.
3. Project sorting

All the open projects you have created are saved on the main screen of the project management interface, and you can sort them.
Sort by Project Name, you can switch between ascending and descending order.
Sort by Modification Time, you can switch between ascending and descending order.
Sort by Project Version, you can switch between ascending and descending order.
You can favorite projects by tapping the Star button in the project:

Activating Favorites in the menu will show your favorite projects at the top
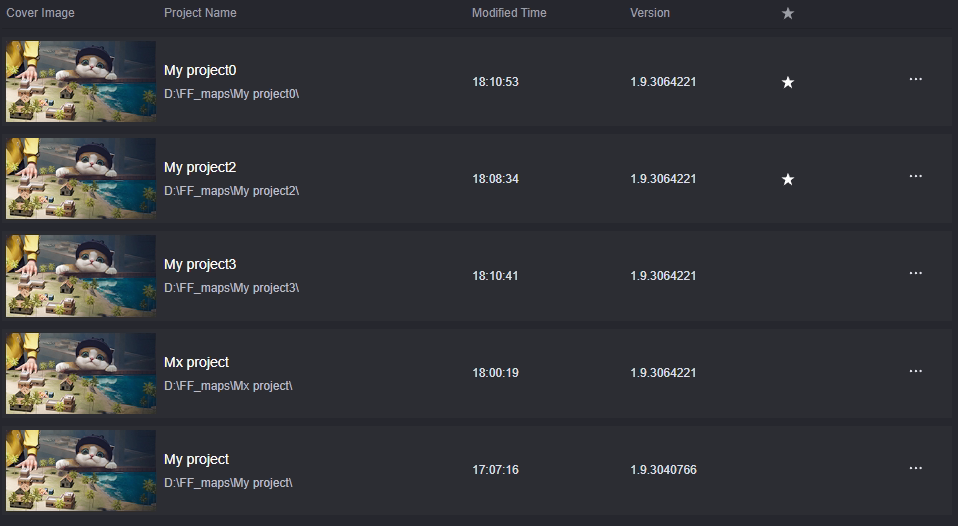
Sorted projects and unsorted projects are sorted in reverse chronological order of modification
Only one sorting rule can be used at a time
Bookmarking is also a sorting rule and cannot be used in conjunction with other sorting rules
4. Search for existing projects

Right-click on a saved project to search for it. The search will match both the project name and the project path. Only projects whose name or path contains the content in the search box will be displayed.
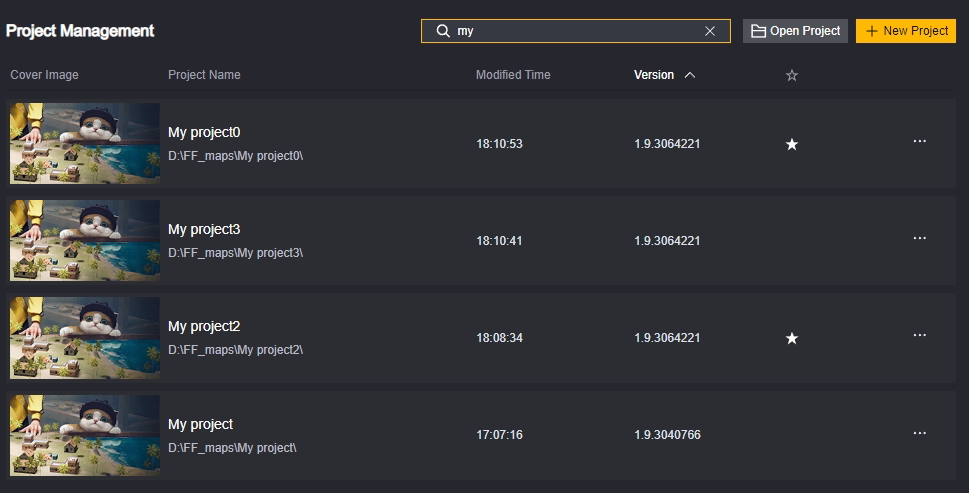
The searched projects are sorted in reverse chronological order, i.e. the last modified ones are at the top.
Other sorting settings do not take effect when searching
5. Settings and users

Settings
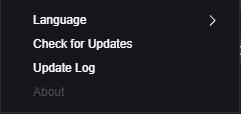
Language: You can change the language shown in the project management and project editing interfaces in real time. However, the language that is changed in real time will not take effect on custom fields.
Check for Updates checks to see if there is a newer version of the editor.
Log of Updates allows you to view the content of the update.
About, stay tuned.
Users
can operate on logged-in users. You need to log in to use the project editor normally.
Manipulate Projects
Right-tap on a project to open the Manipulate Project Panel

Show in resources: Browse the project in the Local Explorer
Rename: Rename the project.
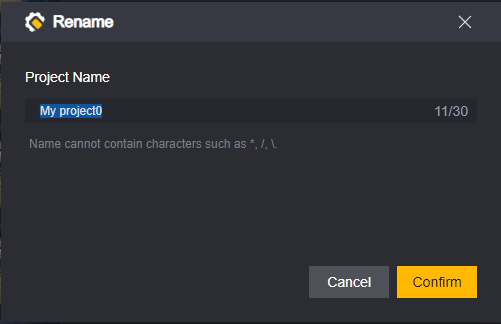
Project names cannot contain special characters as per Tips
Delete: Delete project
Tap to delete will bring up a second confirmation UI
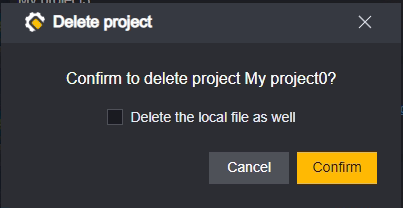
Clicking Delete the local file as well will also delete the project folder from your local storage.
If you do not select Delete the local file as well, the project folder will still exist locally on your device, and you can add it back to the Management Panel at any time by opening the project.
Open multiple projects
Tap on a project to open it. You can open multiple projects at the same time.
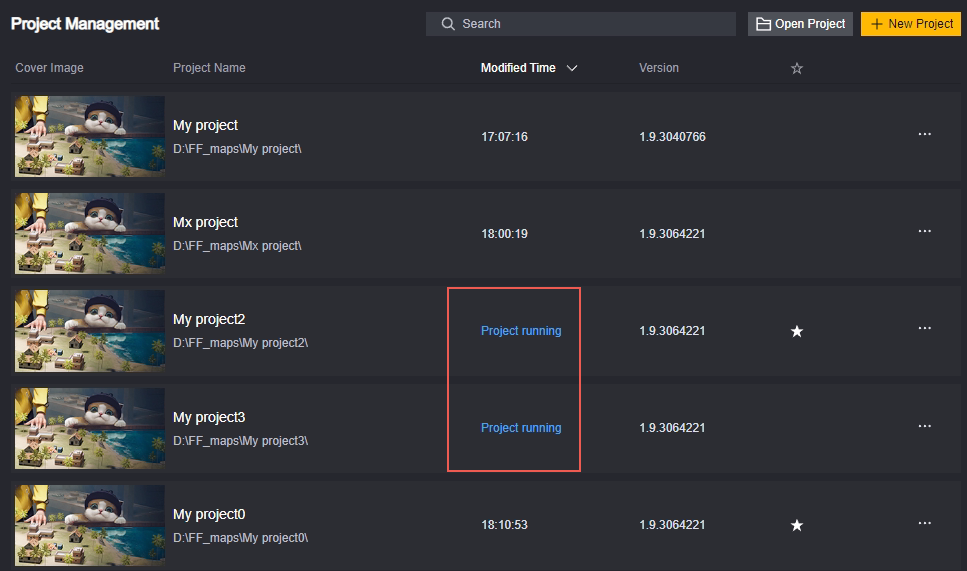
When opening multiple projects, you need to pay attention to whether the project you are editing is the project that needs to be edited
Project editing interface
Layout
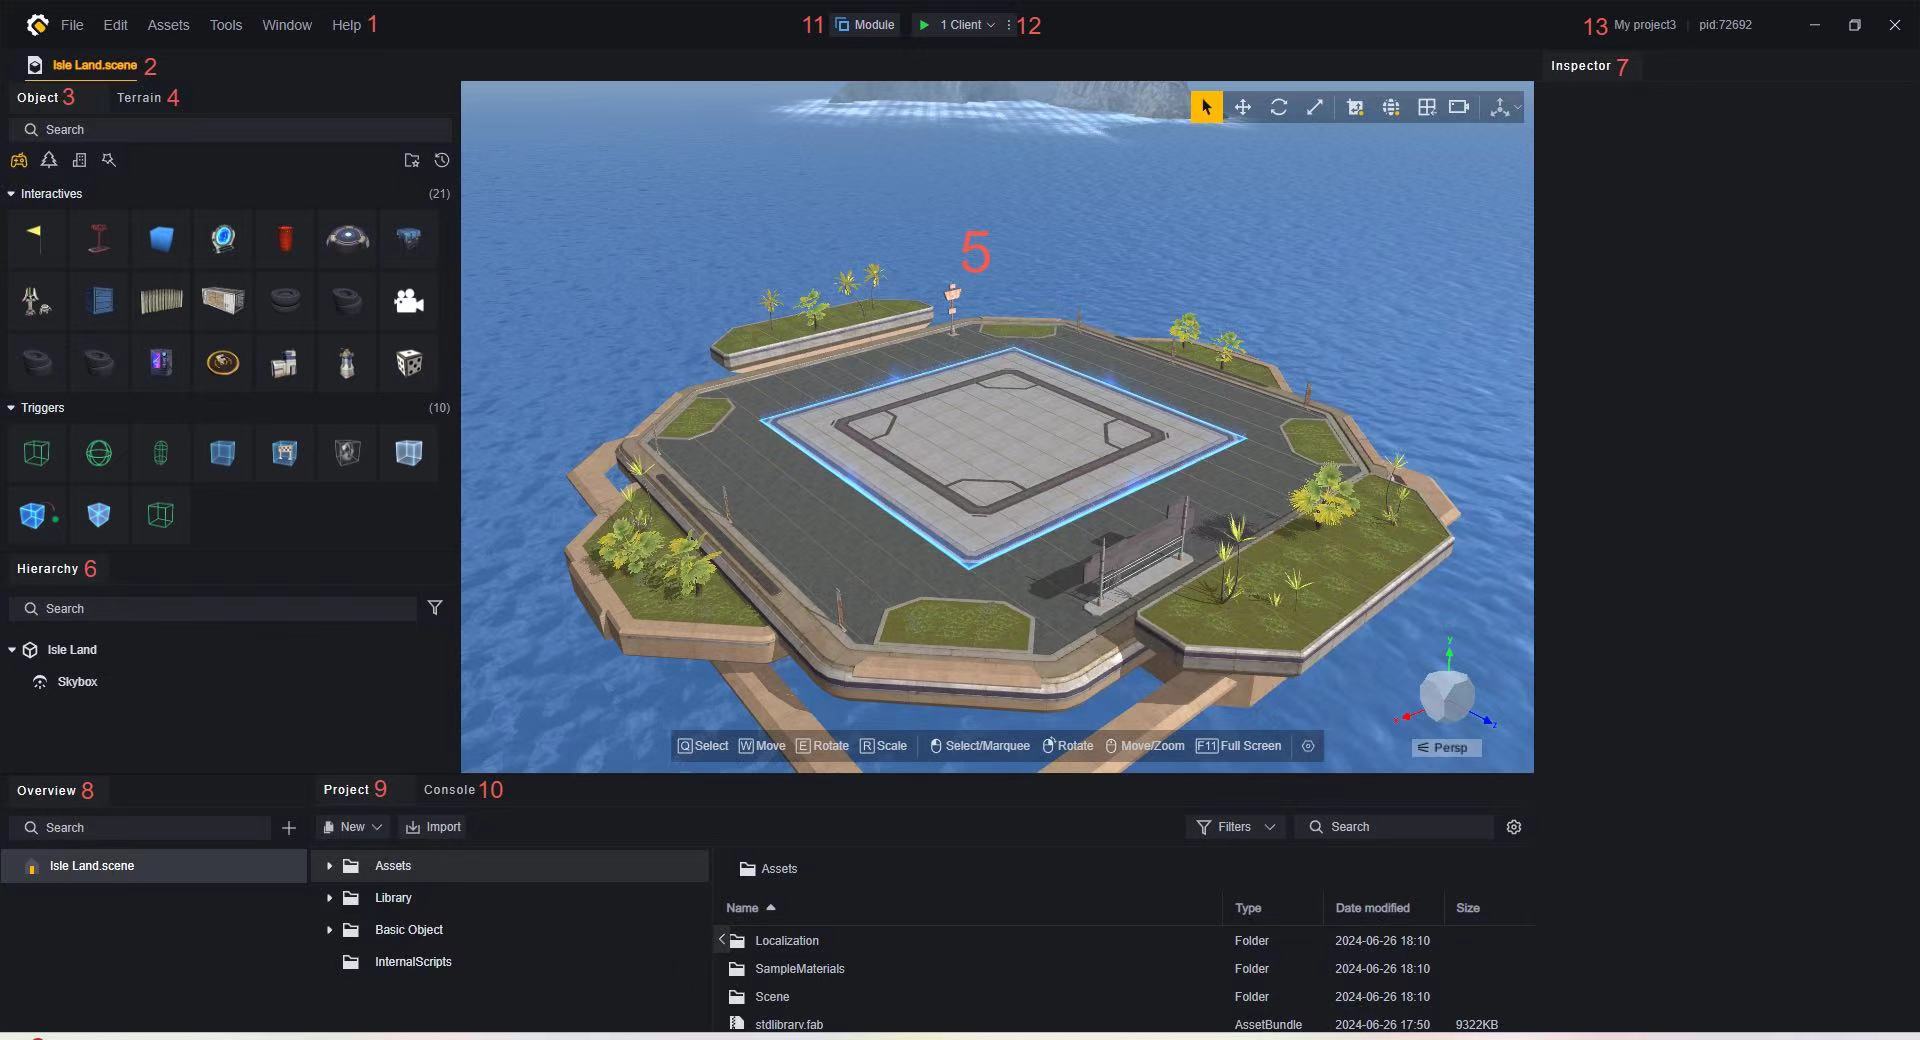
Of these, 3-7 are elements specific to scene editing and will be explained in detail in other articles
All windows support dragging the border to change the size, which helps you focus more on editing in a certain area.
Layout introduction
1. Menu
The menu is used to operate on the entire project and is divided into several categories:
- File: Operate on project files, make system settings, and Exit project editing.
- Edit: Save, undo, and restore the entire project, and edit selected objects.
- Assets: Operations related to asset import/export and online purchase.
- Tools: Tools provided to developers for optional use.
- Help: Provides user manuals, instructions, and other help.
2. File tab
All open files, regardless of category, are arranged in order on the tab.

Unsaved modified files are marked with an asterisk. Only changes to the Content (or removing files) are marked, not changes to the Position of the files or the order of the tabs.

The file that is being selected is marked in yellow with an underline.

Depending on the selected file type, the main page will change to the editing interface for the corresponding file type. Including but not limited to:
- Scene Editor
- Primitive Script Editor
- Behavior Tree Editor
- Animation Controller
- Player Data
- UI File
You can drag the tabs to change their order.


When a certain number of files have been opened, you can scroll through the tab list using the scroll wheel. There are also buttons at the beginning and end of the tabs for quickly jumping to the first/last tab.

Right-click on a file on a tab to open the context menu.
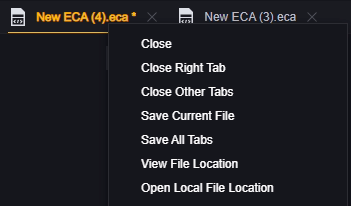
Close the right tab to close all tabs on the right side of the file, and close other tabs to close all tabs except this one.
The main scene will not be closed.
Tips will pop up in sequence for files that have not been saved.
View File Position will locate the file in the 9. Project Assets interface.
Open Local File Position will locate the file in your Local Position.
3. Object selector
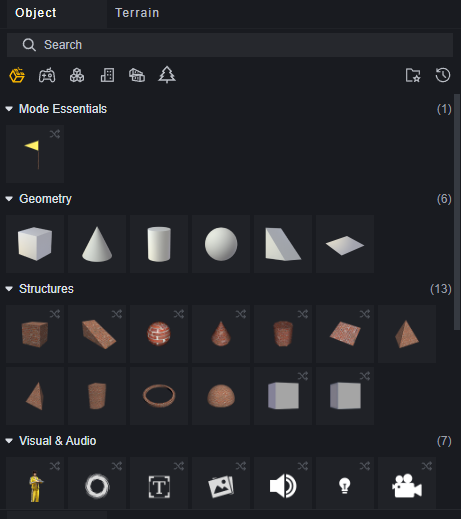
The object selector is the editor for the scene file, where you can select the objects to be laid out in the scene.
We offer several categories, which are

Basic Structures:
basic structure, sound or vision effect.

Functional objects:
objects with their own logic that can be used to build gameplay.

Modular Component:
The structure or decoration of various themes, classified by theme.

Architecture:
The complete building.

Scene items:
furniture, decorations, props, and other decorative parts.

Nature:
decorated with trees, rocks, etc.
Frequently used objects:
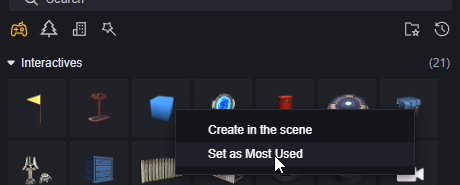
You can right-click to mark some items as frequently used, and then view them in the frequently used items:

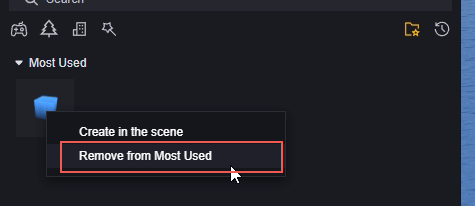
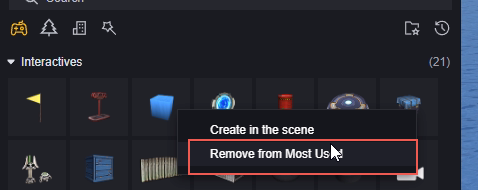
has been set as a frequently used object. You can cancel this setting.
Object support search.

How to arrange objects in Scene is explained in detail in a separate article.
4. Landscape Editor
The Landscape Editor allows you to edit the landscape, for example to create mountains and valleys.
More information can be found in a separate article.
5. Scene Editor
The Scene Editor provides a visual representation of the elements in the current scene.
You can modify the scene using the 3. Object Selector and 4. Landscape Editor.
More information can be found in a separate article.
6. Hierarchy
The Hierarchy shows all the Custom Objects in the scene and their hierarchical relationships. You can use the Layer menu to set up the parent-child relationships between objects.
This will be explained in detail in a separate article.
7. Inspector
Select an object in the 5. Scene Editor and the Inspector Panel will display all the components of this Entity.
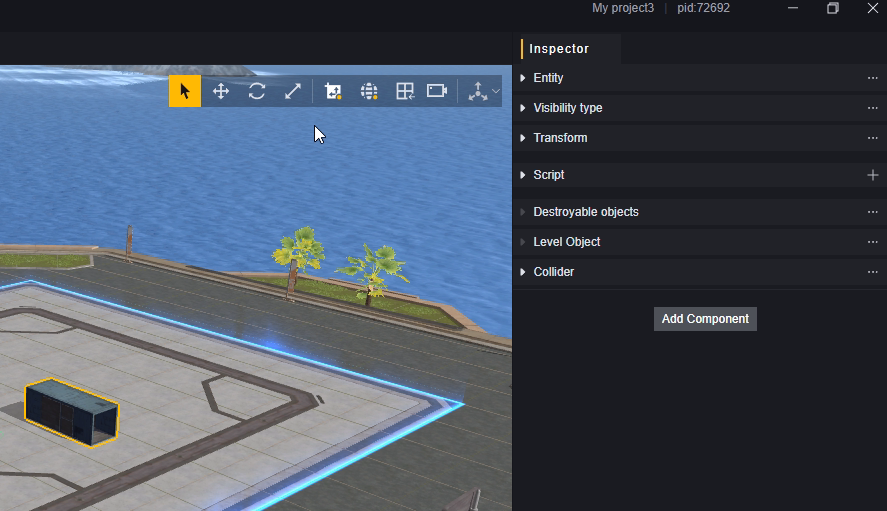
Here you can modify component parameters and add or delete custom components.
This will be explained in detail in other articles.
8. Overview
The overview shows a certain type of file in your project, depending on the file type you selected on the 2. Files tab. The figure shows the case where the metafile script file is selected:
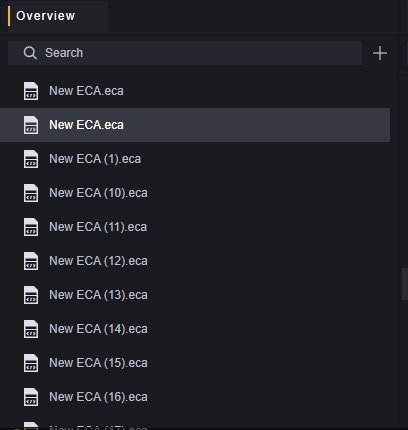
Double-clicking on any file in the overview will open it for editing. If the file is not open in the Files tab, it will open. If it is open and not selected, it will be selected.
Editing any file in the tab will automatically highlight the corresponding file in the overview. This highlighting will be slightly brighter than if you manually select it in the overview:

The file being edited is New ECA(12).eca, and the file selected in the overview is New ECA(11).eca.
Right-click on any file in the overview to perform the following operations:
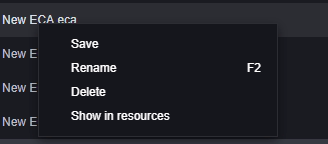
Save, rename, remove or browse the file resource locally.
The overview supports search, which is mainly used to locate a specific file when there are too many of this type.

Tap the Plus button in the overview to create a new file of this type. The new file will be saved in the corresponding specified folder:
| File Type | Extension | Folder |
|---|---|---|
| Entity Script | .eca | Assets/ECA |
| Behavior Tree | .xbt | Assets/XBT |
| Scene | .scene | Assets/Scene |
| Animation Controller | .ac | Assets |
| Player Data | .playerdata | Not supported in the overview when creating new ones |
| UI Files | .ui | Assets/UI |
9. Project Assets
Project Assets shows the asset files in your project. You can right-click on the file name to sort the files by their position, so that you can find the Resource files you need more easily.
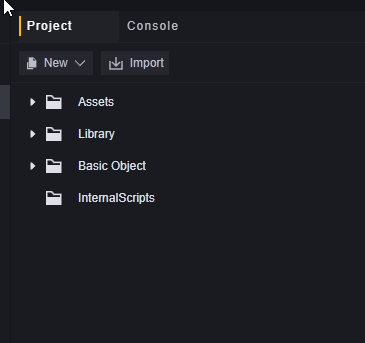
The content of the Assets folder can be customized, while the content of other folders cannot be modified. You can view these official assets that cannot be modified.
The editor will only recognize the corresponding folders in the Local file, and other folders in the project will not appear in the editor.
The Assets folder in a new, blank project is shown in the figure

The left side of the image shows the folder structure. Only folders will appear on the left. The right side shows the specific files, and both folders and files will be displayed on the right. You can use Ctrl + wheel to zoom in and out on the right side. Let’s add a new ECA file and scale it down.

In the folder structure, you can create new content using the New button or import your local assets using the Import button.

For new operations, right-click the folder in the folder structure to select New, or right-click in the empty space in the file area to create new content in the specified folder.
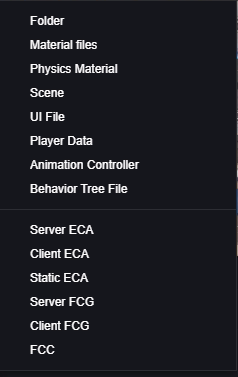
This is a list of new content based on version 1.9.0. The supported file types may differ depending on the version
10. Console
Used to display Tips, Warnings and Wrongs for the entire game. There is also a console in 12. Debug, which is mainly used to display information during a single run of the game.

Using the console, you can obtain the time points at which each node occurs, as well as warnings and error messages, which is helpful for debugging.

Tap a category to show or hide the category

Use the search function to display tips that match the content of the search in the displayed categories. The category display on the right will also change to show the categories of the search results.

11. Modules
The modules tab allows you to manage the modules of your project. Some key modules are pre-loaded, and some optional modules are available for selection as needed.
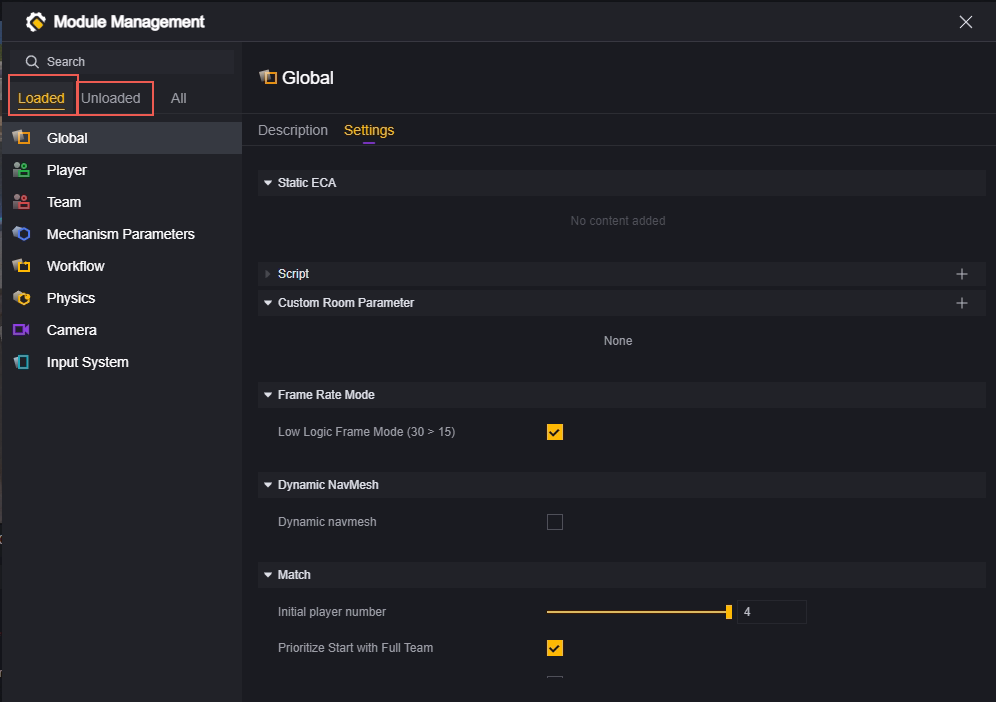
Right-click on the module to load it if it is not already loaded. Refresh the page categories by switching between tabs.

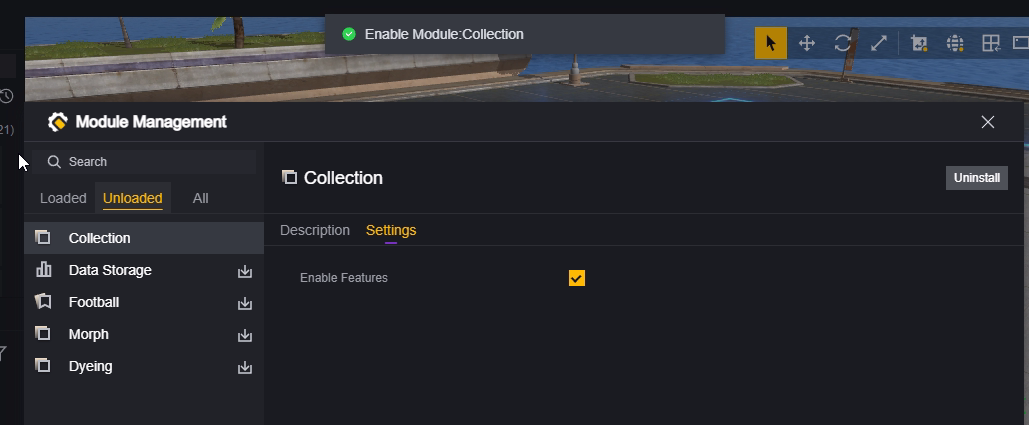
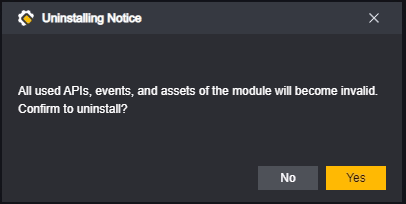
Some of the loaded modules cannot be uninstalled. Modules that can be uninstalled can be uninstalled using the uninstall button. Page categories will refresh when switching tabs.
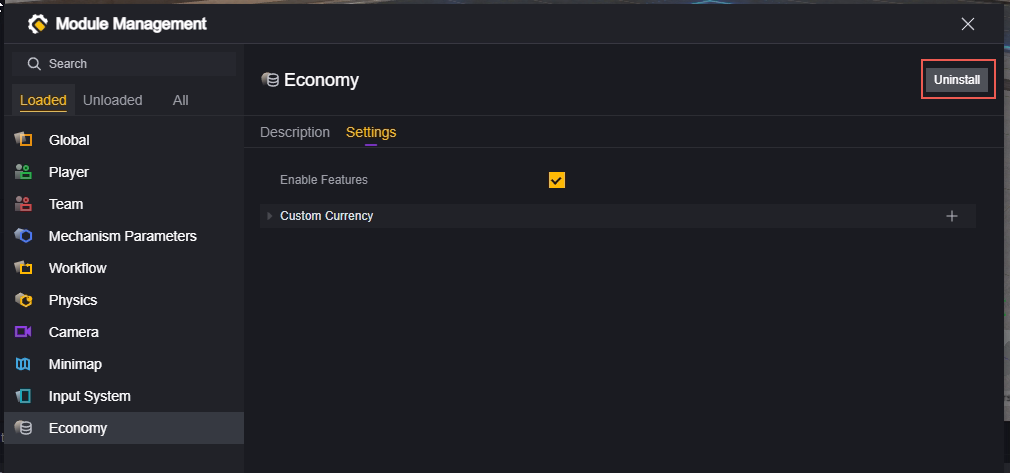
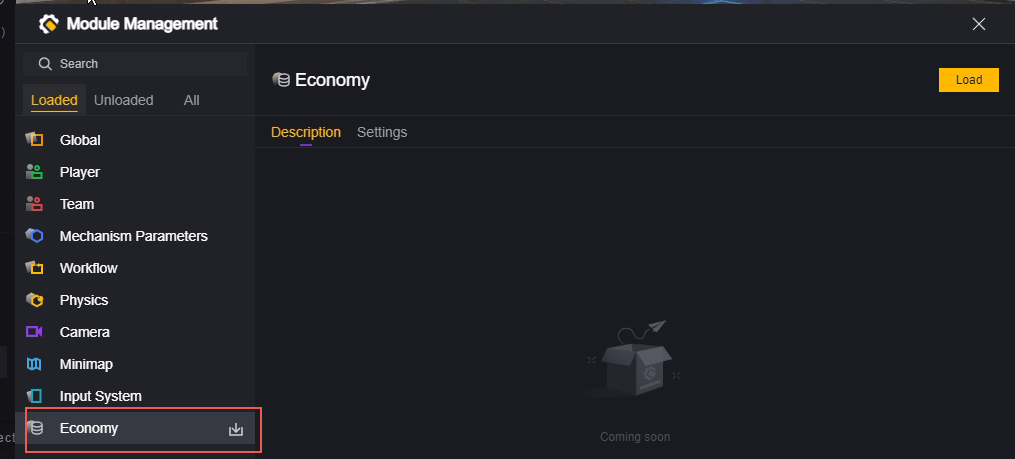
When uninstalling a module, you need to pay attention to whether the API, event, or asset of the module has been used. Directly uninstalling the module may cause unexpected behavior.
Important module content will be described in other articles.
12. Debug
Debug is a way to visually inspect the content of the game and verify that the performance meets expectations. Using Debug will open at least one game process, and you can see if the game is running as expected.
The entire project is automatically saved when using Debug.
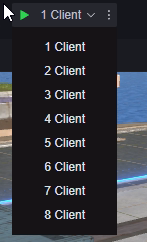
Debug supports multiple clients debugging at the same time. Select the count of clients, and the corresponding number of clients will be opened. They will be treated as different Players participating in the game. Up to eight clients can run simultaneously.
Debugging has some configuration items that can be modified to achieve the debugging environment you need.
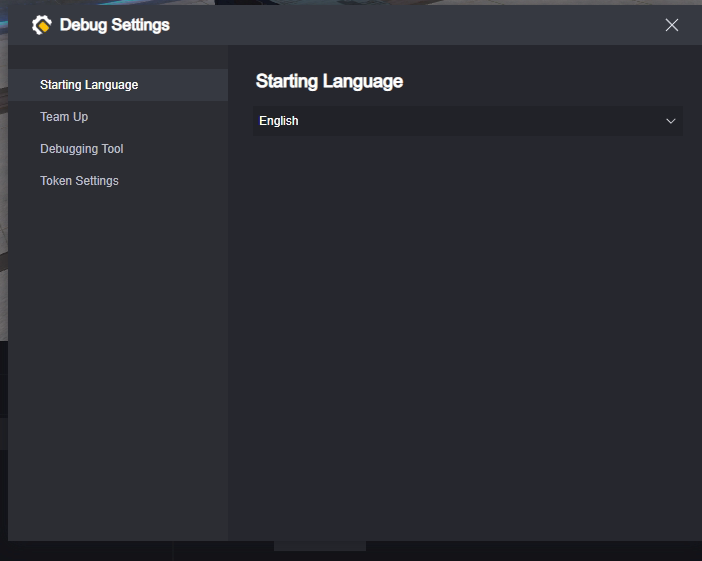
Debugging is described in detail in other articles.
13. Basic information
Basic information shows the current project name and project ID.