Module
A module is a functional module with a logical closed loop. It encapsulates internal complexity and provides simple interfaces to the outside.
A module generally contains a class of configurations, assets, functions, etc. that are related to each other. After loading the module, you can set up the relevant elements of the game.
You can open the module manager in the upper position of the editor:
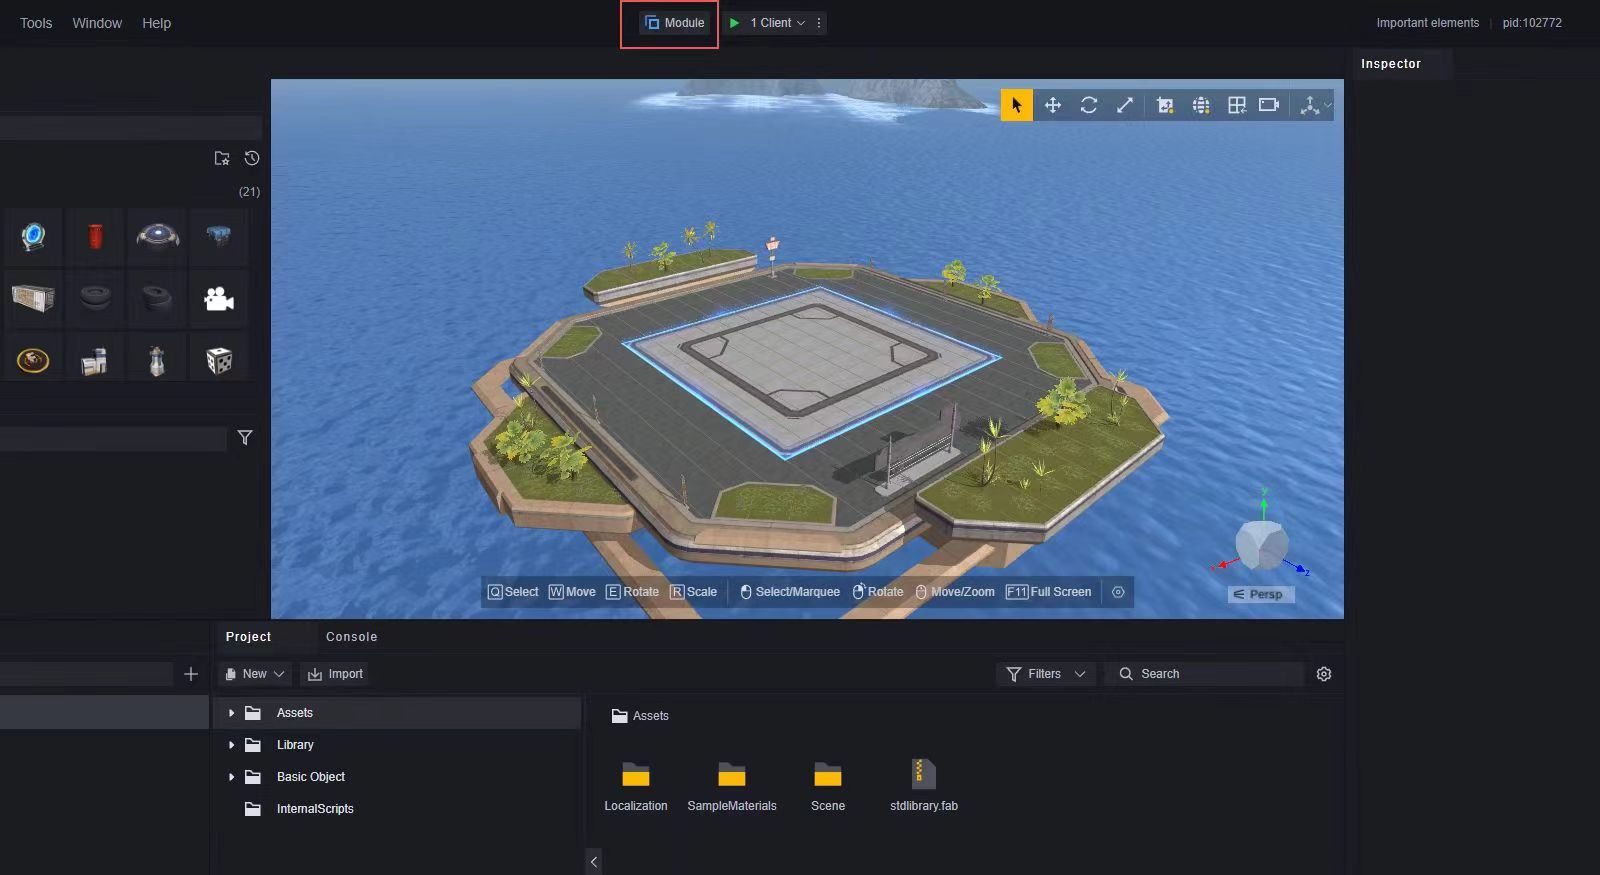
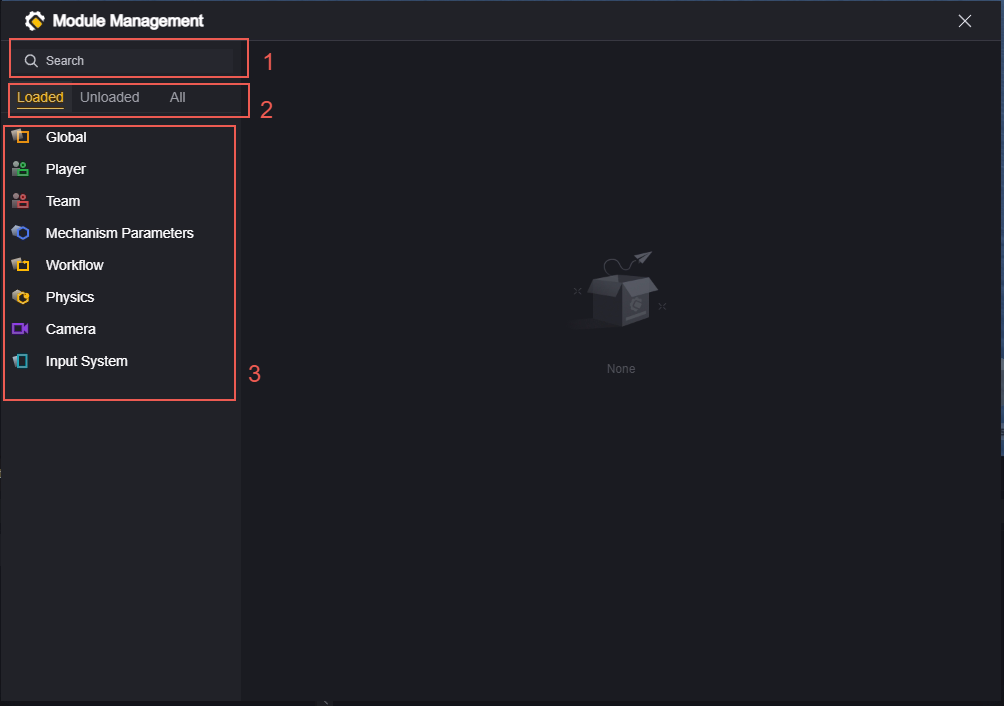
- You can search all modules.
The search scope is all modules, regardless of whether the module is loaded or the currently selected category, you can directly search for the corresponding module.
-
The modules are divided into categories: Loaded, Unloaded and All.
-
The module list shows all modules in the selected category. Click on a module to view its configuration.
Loading and unloading modules
By default, we have already loaded some modules for you. Modules in the unloaded category are optional.
Loading modules
The symbol behind the module indicates that the module has not yet been loaded. Click on the symbol to load the module.

It can also be loaded via the load button in the module configuration interface.

Uninstalling modules
For modules that can be uninstalled, there will be an uninstall button on their configuration interface, which can be clicked to uninstall.
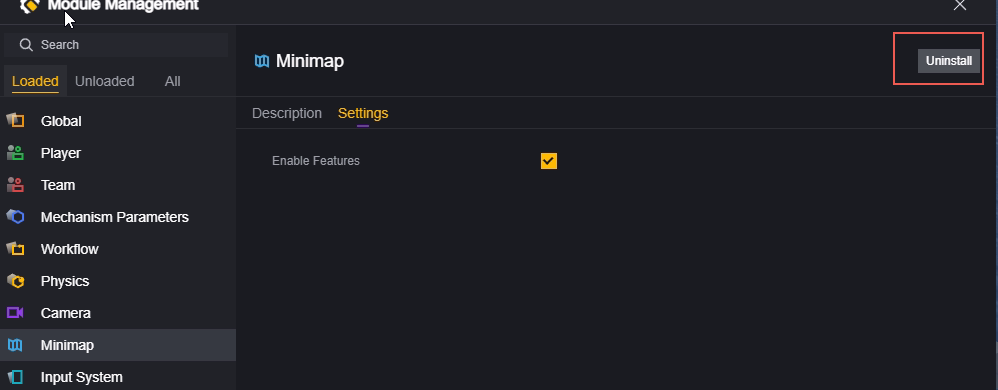
Some modules are essential and cannot be uninstalled. They can only be reconfigured. Such modules do not have an uninstall button.
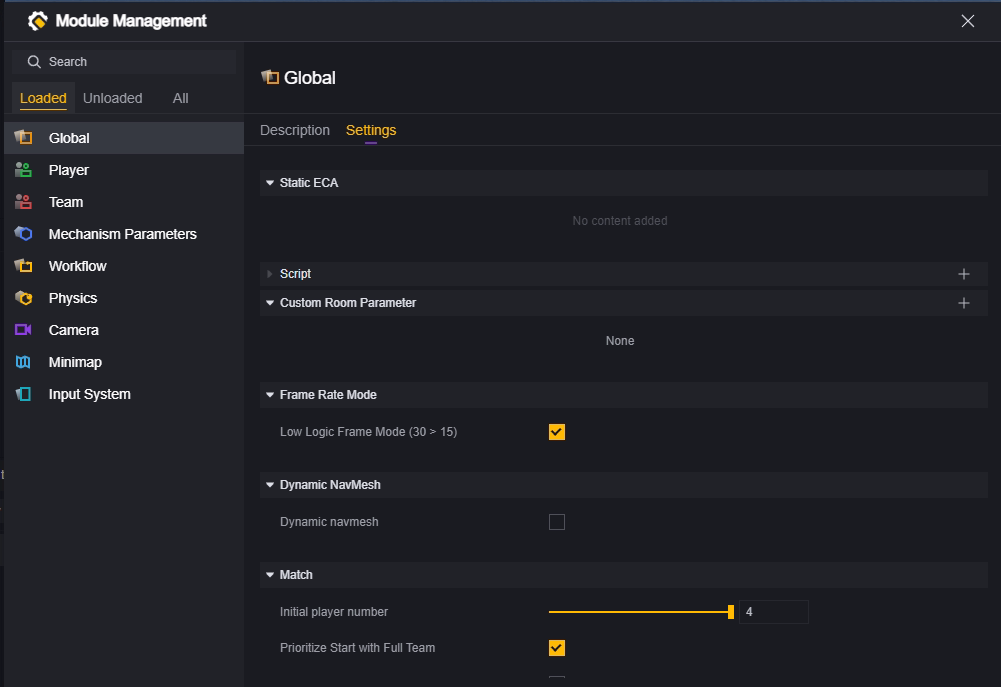
Operations to load/unload modules will not be immediately reflected in the category display. It is possible that a loaded module will appear in the unloaded category column. Refresh the category tab to update.
Module configuration
For modules that have not been loaded, there is only one available action: load. After loading, the module can be configured in detail.
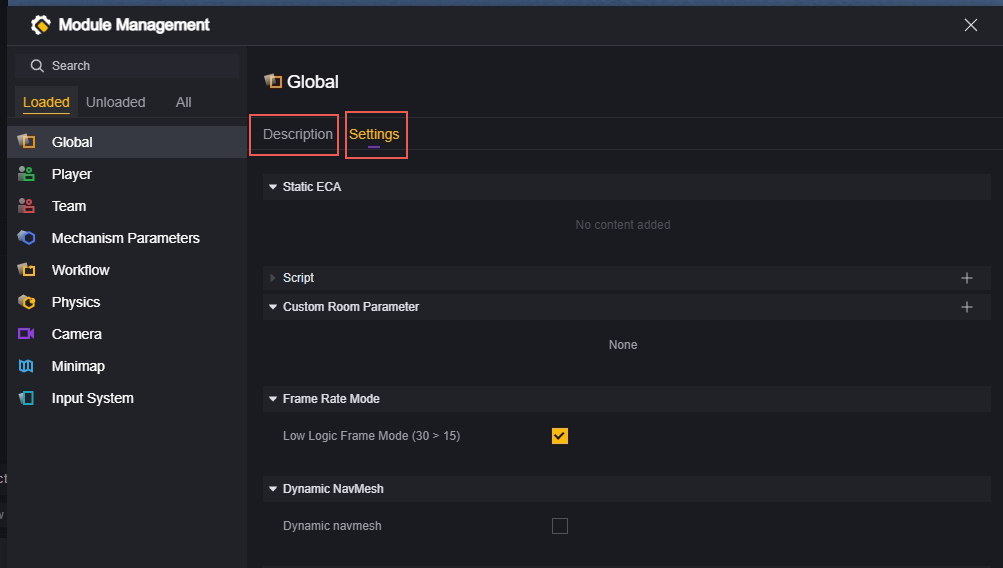
After selecting a loaded module, you can view the description of the module and the specific configuration items.
For configuration of important modules, please refer to the corresponding manual articles.
Entity
Entity is one of the important concepts of UGC.
An entity is a concrete/abstract concept or a collection of concepts. Entities have properties, and modifications to properties will affect the instances created from the entity.
The concept of entity is very broad, and most concepts in this game exist in the form of entities.
For example, the “player” entity refers to the concrete concept of a player. The health value is a property of the player entity. Specific players A and B in a game are two instances of the player entity.
Both player A and player B have the health value property of the player entity. The difference is that player A has 150 health points and player B has 200 health points.
Health is a property of the player entity, and 150 and 200 are the properties of the instances.
In addition to entities that can be visualized, such as players, vehicles, and weapons, there are also abstract entities that cannot be directly visualized, such as the Global and the Workflow.
Abstract entities also have properties and can create instances.
For example, the Workflow is an abstract entity, and the duration of the preparation phase is one of its properties. Assuming that two games are played, an instance of the Workflow is created for each game.
The first game preparation phase lasts 5 seconds, and the second game preparation phase lasts 10 seconds. The 5-second and 10-second preparation phase durations are instance properties of the Workfolw.
In most cases, when the game refers to an entity, it actually refers to an instance of the entity, for example deleting an entity, obtaining an entity’s properties, or modifying an entity’s properties. The object being manipulated is always an instance of the entity. In the following and in other articles, it is not necessary to specifically emphasize the distinction between entity instances and entities.
Entity lifecycle
As mentioned above, the actual objects on which the lifecycle operates are the instances of entities.
The lifecycle means that an entity always goes through a specific process from creation to destruction. You can achieve the desired design by mastering the lifecycle of the entity that needs to be edited and then manipulating the entity at a specific point in time. All entities start their lives with Awake and end with Destroy. Most entities will be activated after Awake through Enable and deactivated before destruction using Disable.
There may be entities that skip the enable or disable stage, but awake and destroy always exist.
General process
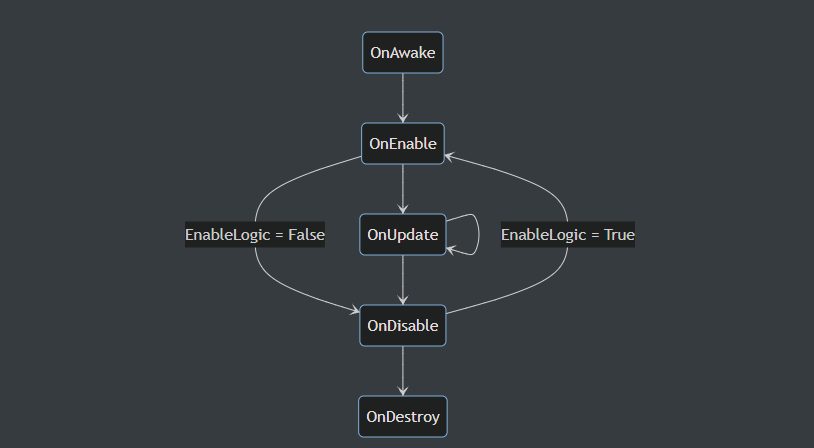
Before Awake, the initial values of all properties are ready and the corresponding bridge entities have been created.
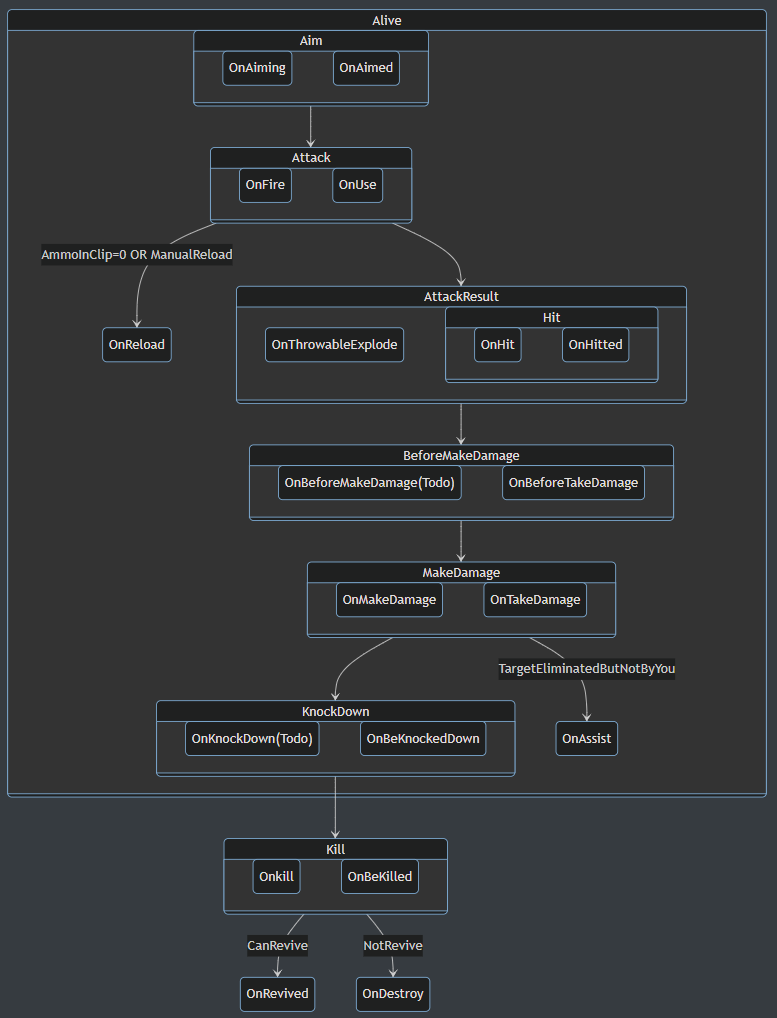
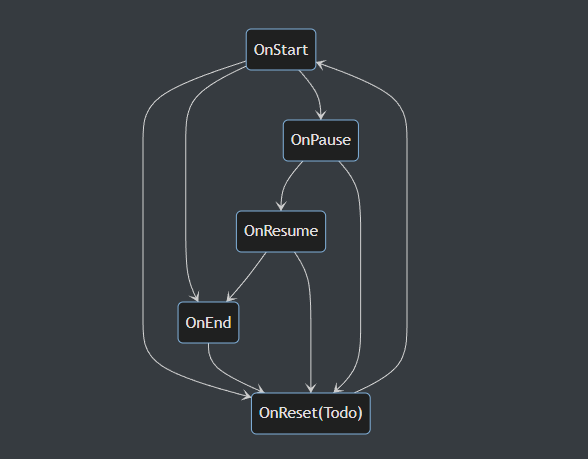
The update part of the life cycle of some entities is given below for reference:
Battle unit process
Playable flow
Scene objects, prefabs and components
In the editor, you can arrange a variety of objects in the scene, which can be purely decorative, triggers, generators, and so on. You can also customize objects by modifying their components and properties.
We provide several categories of pre-made objects in the editor, which can be configured by dragging them into the scene.
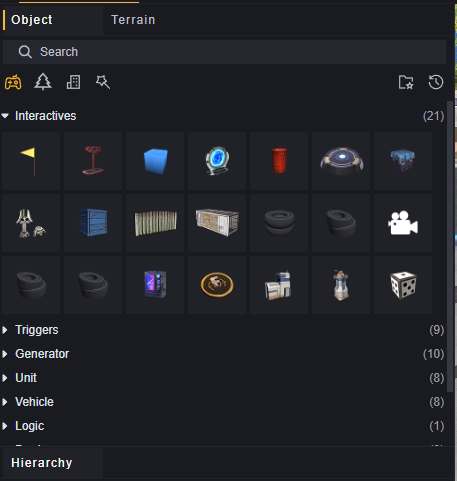
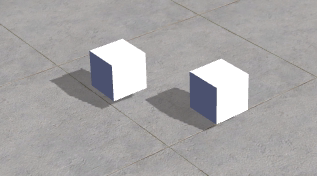
Take the basic object cube as an example. We place two cubes in the scene.
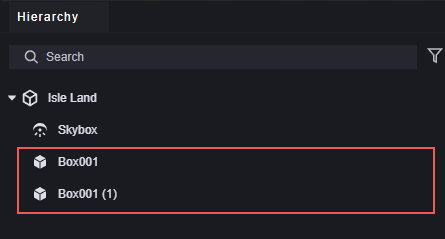
The configured objects are managed on the Hierarchy.
Components define the behavior of an object. Some components must be loaded on the corresponding object, while others are optional. We will provide a default component configuration for the object, which you can modify as needed.
Take the cube above as an example. Select any cube and you can see that it is already configured with some components by default in the inspector panel.

You can edit which components are configured by clicking the Add Component button.
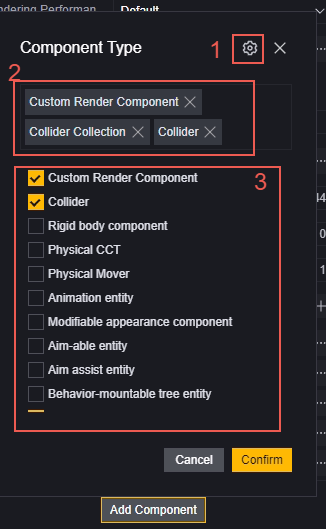
-
Configure the component, and the component settings will be synchronized to all entities that load the component.
-
Components that have already been loaded.
-
Optional components. Select to load, deselect to unload.
Prefab is a template for objects. You can modify all objects configured by the prefab at the same time through the prefab.
Drag an object on the scene to the asset bar to create a prefab.
- Create a prefab folder. This step is not necessary, but it is recommended for easy file management.

- Edit the objects you want to use as a prefab, for example, stack one cube on top of the other and create a hierarchy to merge them into a single entity.
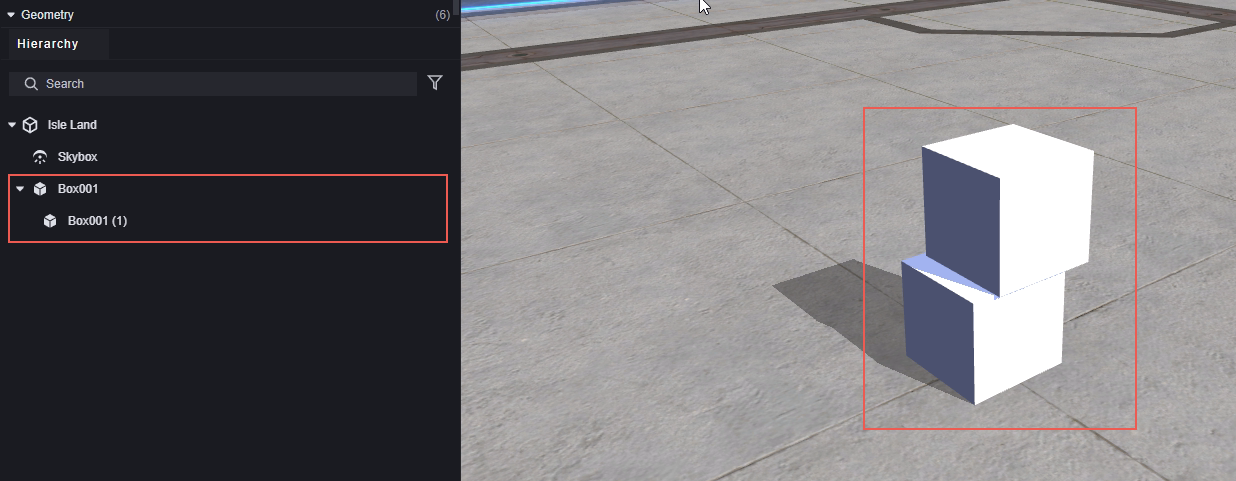
- Drag the modified object from the hierarchy view and drop it into the Assets area.
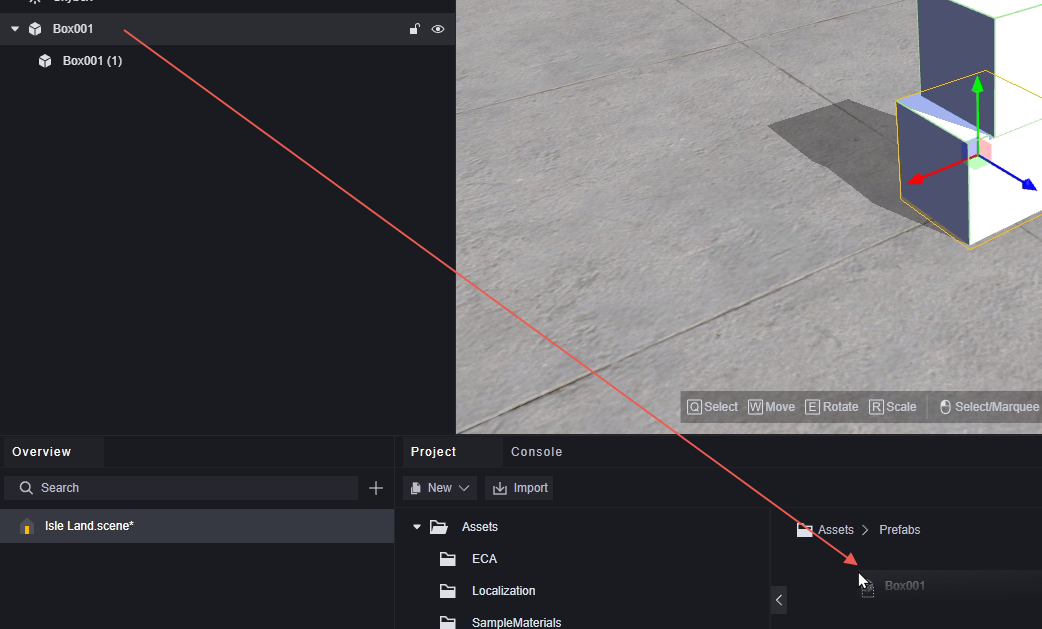
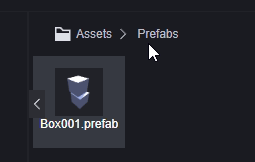
Multiple prefabs can be created for the same object, but only the latest created prefab will be used as the object’s prefab.
- Objects with prefabs will be marked in blue in the hierarchy.

- You can create an identical object by dragging a prefab from the asset file onto the scene.
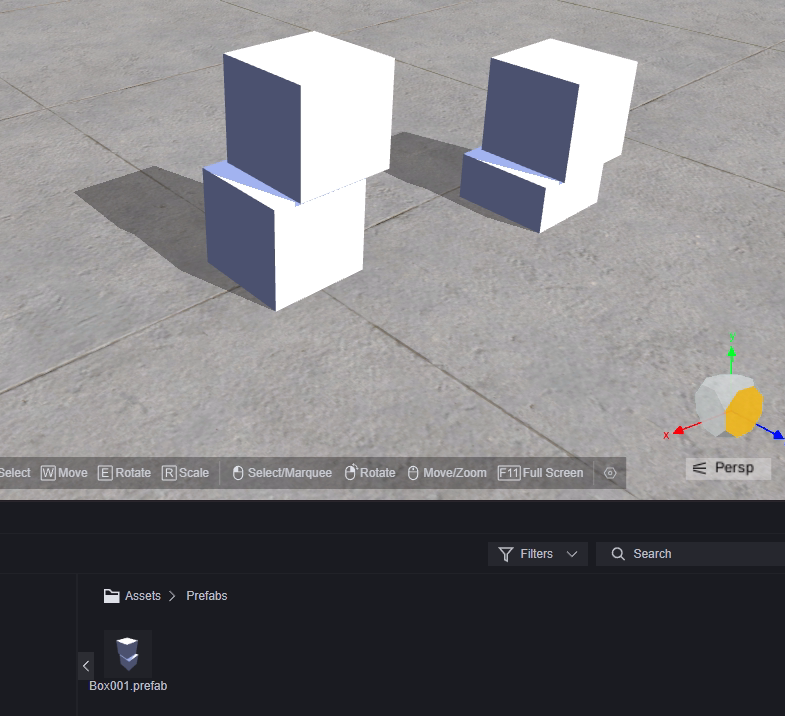
- Editing a prefab synchronizes with all objects created from it. You can quickly edit a prefab in the inspector by clicking on it, or double-click to enter the detailed editing interface.
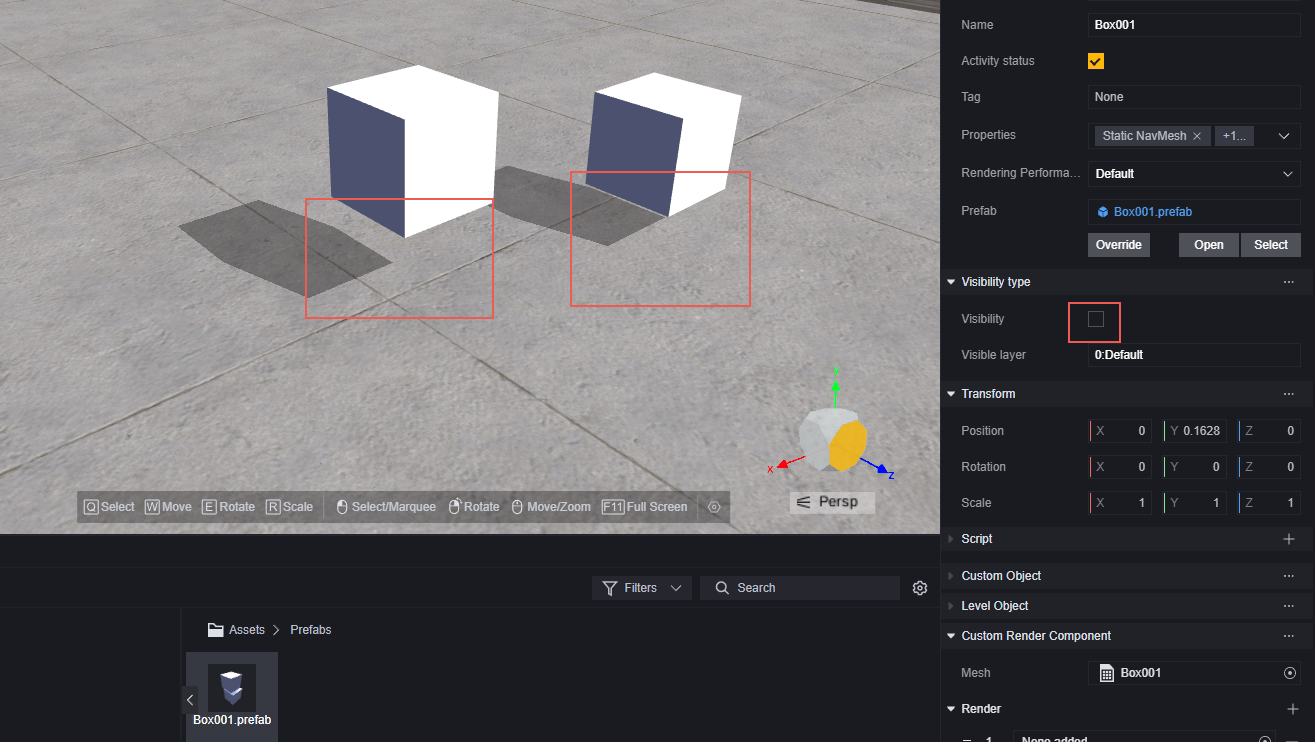
Only the visibility of the main object is turned off here, because in the quick access screen only the cube in the structure that is the parent object can be edited. Complex editing can be done by double-clicking on the prefab to enter the detailed interface.
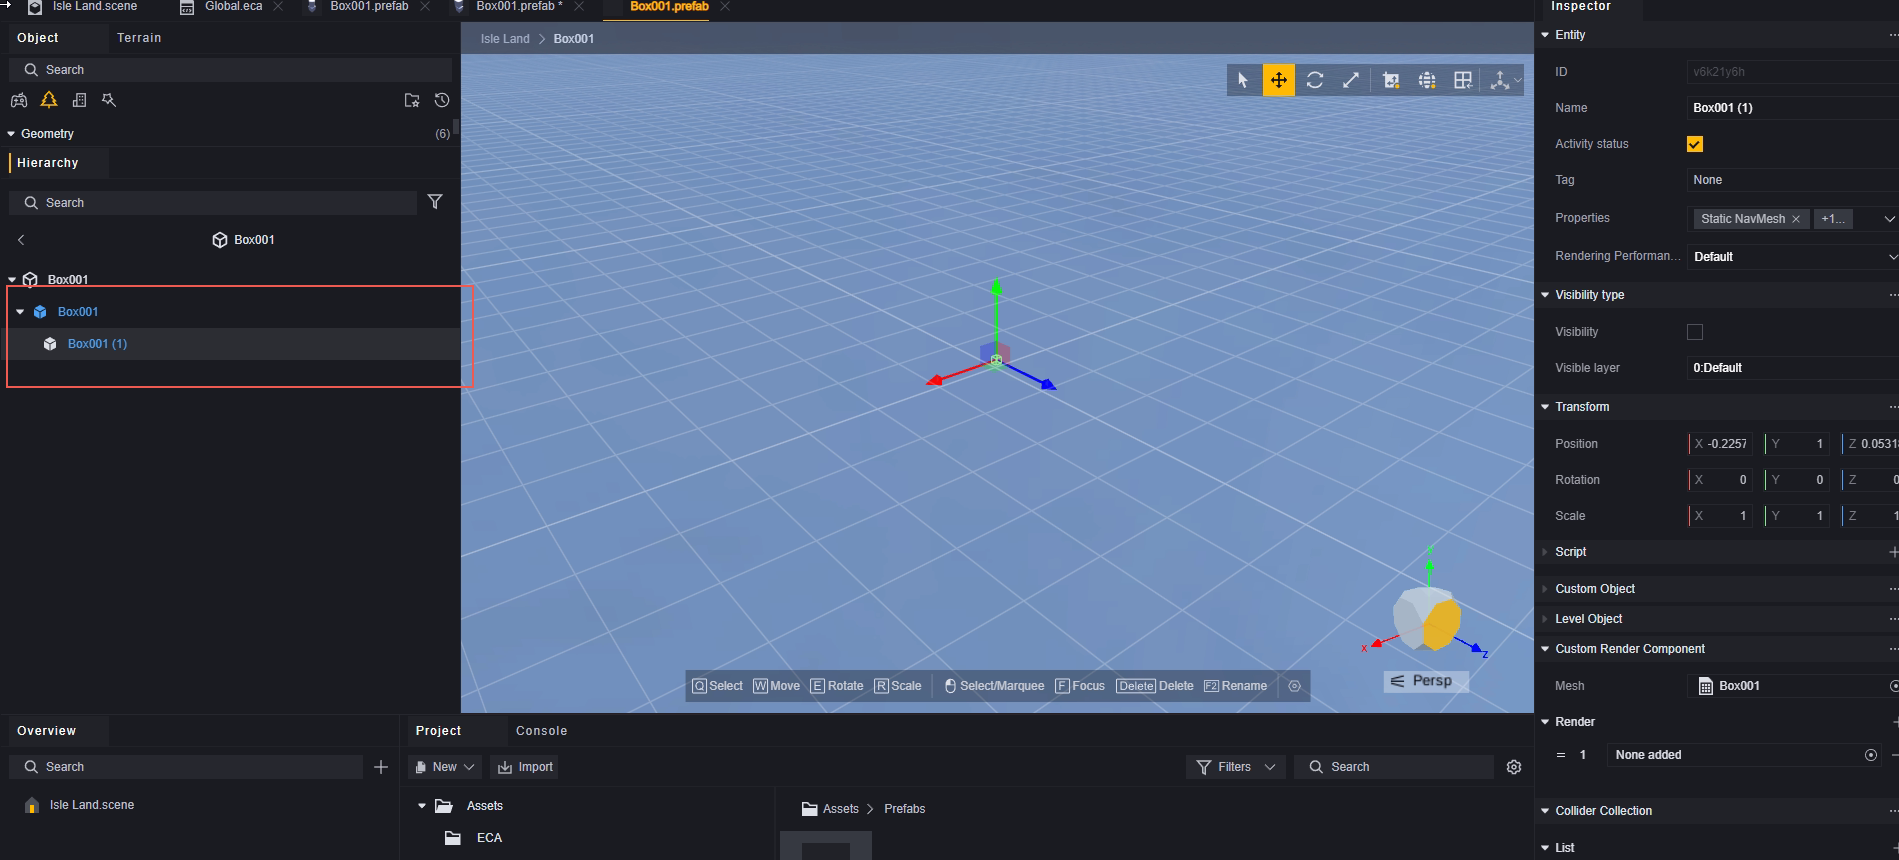
After opening the detailed interface, you can edit all the structures of the prefab.
- Editing an object will not affect the prefab or other objects with the same prefab.

- Deleting a prefab will not affect the objects that have already been created, but the objects created from this prefab will be marked in red in the hierarchy window.

Assets
Assets are files used in a project to create game content. Resources must be of a type supported by the editor. They can be created in the editor or imported from external sources, and can also be exported and used as assets in other projects.
Assets can be confirmed in the project interface, and only the contents of the Assets folder are supported for customization.
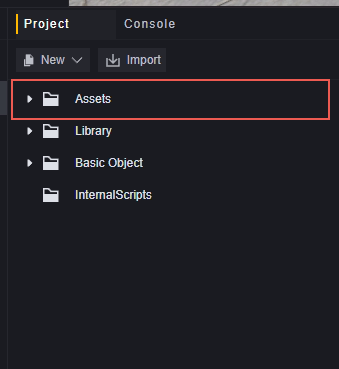
Supported asset types
| Asset type | Description |
|---|---|
| Material files | Materials can change the appearance of objects. Materials are always used via shaders. |
| Physics Materials | Physics Materials can change the physical properties of objects, such as elasticity and friction. |
| Scene Files | Scenes are the interface for processing game content and contain resources for all or part of the game. For more complex games, you may need multiple scenes to implement the design. |
| UI Files | UI is the interface for user operations or displaying information for users. |
| Player data | Player data allows you to customize the player character, including its appearance, movements, etc. |
| Animation controller | The animation controller allows you to arrange and maintain a set of animated transitions for a character or object, and set the playback of each animation clip. |
| Behavior tree file | The behavior tree file allows you to set the behavior of a character or object. |
| Script-related | Scripts can be written in the form of primitives or code to add custom logic to the game. |